
Hanging curtains correctly can make a significant difference to how your windows look and how smoothly the curtains operate.
To hang curtains, first check that your pole or track is securely fitted, prepare the curtain heading, attach the appropriate hooks or rings, and position the fabric so it hangs evenly. The exact process depends on whether you have eyelet, pencil pleat, pinch pleat or wave curtains.
Some curtains thread directly onto a pole, while others use hooks attached to curtain rings or track gliders.
This guide explains how to hang different curtain styles, how to install a curtain pole safely, and how to avoid common problems such as uneven hems, sagging headings and curtains that are difficult to open.

Before You Hang Your Curtains
A little preparation can make the installation easier and help protect your curtains.
Check the Measurements
Before attaching the curtains, confirm that their finished width and drop are suitable for the installed pole or track.
Remember that the drop measurement depends on the curtain heading.
For example, eyelet curtains hang directly from a pole, while conventional pencil pleat curtains usually hang from hooks attached to rings or track gliders.
If you’re still planning the installation, read our guide to measuring curtains before fitting the hardware.
Check Your Pole or Track
Make sure the existing pole or track is:
- Securely fixed to an appropriate surface.
- Suitable for the weight of the curtains.
- Compatible with the chosen heading.
- Free from obvious damage or loose components.
- Positioned so the curtains can move without hitting window handles or other obstructions.
Heavy lined or interlined curtains may require more substantial hardware and fixings than lightweight decorative panels.
Prepare the Curtains
Lay the curtains out on a clean surface and inspect the fabric, lining and heading.
Check for any damage or missing fittings.
If the curtains are creased, follow the manufacturer’s care instructions before steaming or ironing them.
Don’t assume all curtain fabrics are suitable for direct ironing. Velvet, silk and certain coated or treated materials may require specialist care.
Gather the Correct Tools
Depending on the installation, you may need:
- A metal tape measure.
- A spirit level.
- A pencil.
- A screwdriver or drill.
- Suitable wall fixings.
- A detector for hidden electrical cables and pipes.
- A stable stepladder.
- Compatible curtain hooks, rings or gliders.
If the pole or track is already securely installed, you may only need the curtain fittings and a stepladder.
How to Install a Curtain Pole
If you’re fitting a new curtain pole, complete the installation before finalising how the curtains hang.
Step 1: Decide on the Position
Mark where the curtain pole will sit above the window.
As a general starting point, poles are sometimes positioned approximately 10–15 cm above the window opening, but this isn’t a universal rule.
The ideal height depends on the ceiling, curtain heading, available fixing space and desired finished drop.
Similarly, allowing around 15–20 cm of pole extension beyond each side of the window can provide useful stacking space, but fuller curtains may require more.
Consider how the curtains will look both open and closed.
Step 2: Mark the Bracket Positions
Use a tape measure and spirit level to mark the fixing points.
Follow the pole manufacturer’s instructions for bracket spacing, including any requirements for central supports.
A long or heavily loaded pole may need additional brackets.
Step 3: Check the Fixing Surface
Before drilling, use a suitable detector to check for concealed cables and pipes.
Identify the wall or ceiling construction and select fixings appropriate for both the substrate and curtain weight.
Plasterboard, masonry and timber require different fixing approaches.
If you’re uncertain about the substrate or load requirements, use a competent installer.
Step 4: Fit the Brackets
Drill and secure the brackets according to the manufacturer’s instructions.
Check that they’re correctly aligned and securely fixed.
Don’t rely on unsuitable general-purpose fixings to support heavy curtains.
Step 5: Fit the Pole
Prepare the pole with the required rings or curtains, depending on the heading.
Then position the pole in its brackets and secure it using the manufacturer’s fittings.
Check that it sits level and doesn’t move unexpectedly.
Important: The following hanging instructions assume the pole or track is already installed correctly and can safely support the curtains.
How to Hang Eyelet Curtains
Eyelet curtains have reinforced rings incorporated into the top of the fabric.
They hang directly from a compatible curtain pole rather than conventional curtain hooks.
Step-by-Step Instructions
- Remove the pole from its brackets, if the design allows.
- Check the eyelet size against the pole diameter.
- Thread the pole through the eyelets, working alternately from front to back to create even folds.
- Arrange the leading edge so the curtain sits correctly when drawn towards the centre.
- Position the outermost eyelet outside the end bracket, where the pole and bracket design permits. This helps keep the curtain’s outer edge in place.
- Return the pole to its brackets and secure it.
- Refit the finials and adjust the folds.
The pole’s bracket arrangement may vary, so follow the manufacturer’s instructions if it uses a different method of securing the curtain ends.
Common Eyelet Curtain Problems
If the curtains don’t move smoothly, check whether the eyelets are compatible with the pole’s diameter and finish.
If the fabric bunches unevenly, adjust the folds by hand.
Eyelet curtains can also need enough space between the pole and the ceiling for the fabric extending above the eyelets.
For these reasons, check pole clearance before ordering or fitting new curtains.
How to Hang Pencil Pleat Curtains
Pencil pleat curtains have heading tape with gathering cords and pockets for curtain hooks.
They’re commonly hung from suitable curtain tracks or poles with rings.
Unlike eyelet curtains, they need to be gathered and fitted with hooks before hanging.
Step 1: Check the Required Finished Width
Measure the width the curtains need to cover.
For a conventional pair of curtains, each panel normally covers roughly half the pole or track width, with any necessary allowance for overlap or ease.
The amount of gathering required depends on the original flat fabric width and heading-tape specification.
Don’t automatically assume every pencil pleat curtain must be gathered to exactly half its original width.
Step 2: Secure the Gathering Cords
Locate the heading cords at the back of the curtain.
Secure one end so the cords cannot pull through the tape.
Then gently pull the cords at the other end to gather the fabric.
Work the gathers along the heading, gradually adjusting the curtain to the required width.
Avoid pulling abruptly or placing excessive tension on individual cords.
Step 3: Tie Off the Cords
Once the curtain has reached the correct width, tie the loose cords securely.
Do not cut the gathering cords.
They may be needed if the heading has to be adjusted later or loosened for cleaning.
Tuck the secured cords into the back of the heading where possible.
Step 4: Insert the Curtain Hooks
Insert suitable curtain hooks into the pockets on the heading tape.
Space them evenly and use the same pocket row throughout the curtain to maintain a consistent height.
For many standard pencil pleat headings, hooks may be positioned approximately 8–15 cm apart, although the tape and fitting manufacturer’s instructions take priority.
The correct hook position also depends on whether you want the curtain heading to sit below or partly conceal the pole or track.
Step 5: Attach the Hooks to Rings or Gliders
If using a curtain pole, attach the hooks to the rings.
If using a track, attach them to the compatible gliders.
Ensure that the hooks are fully engaged and that the curtain is supported evenly.
Step 6: Adjust the Pleats
Once the curtains are hanging, distribute the gathers evenly along the heading.
Stand back and check that the top edge looks balanced and both panels finish at the intended height.
Gently arrange the folds to encourage the fabric to fall neatly.
Explore Zenn Interiors’ made-to-measure pencil pleat curtains for more information about this versatile heading.
How to Hang Pinch Pleat Curtains
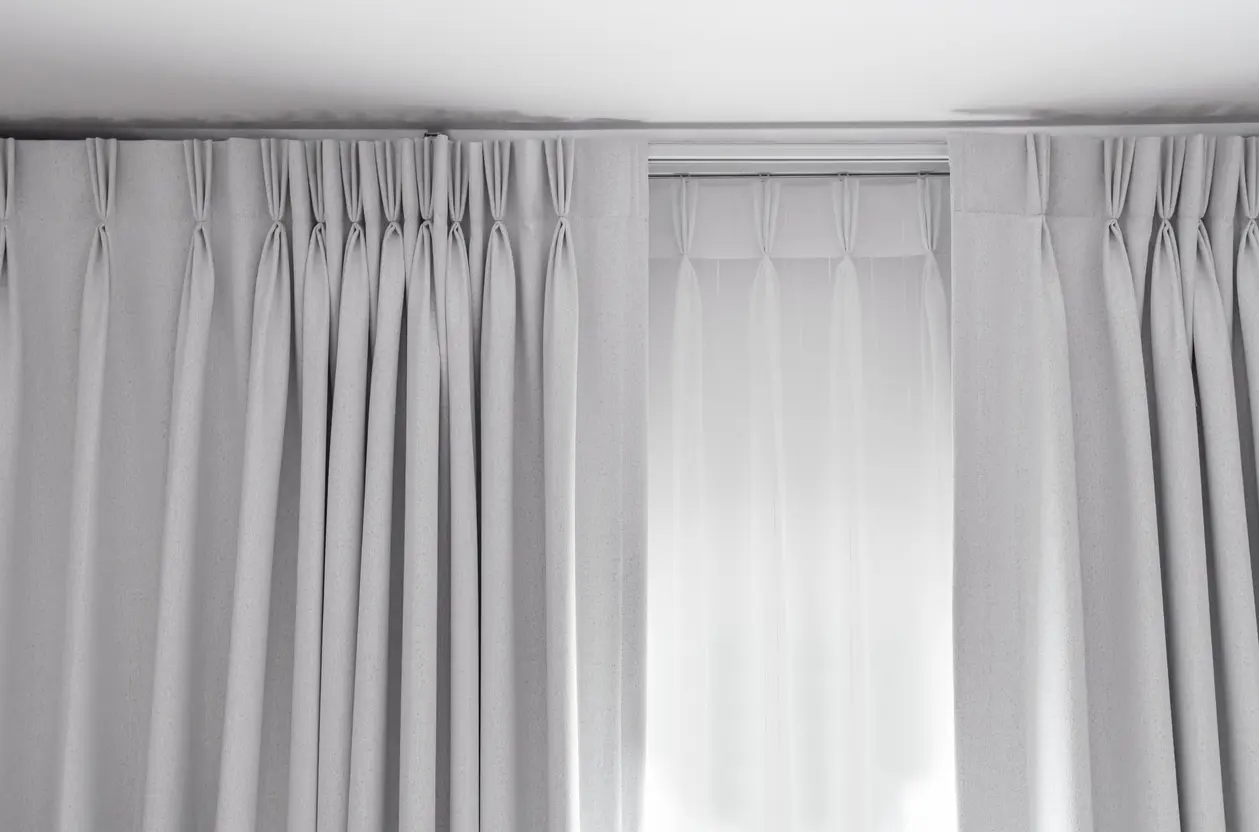
Pinch pleat curtains have groups of folds permanently stitched into the heading.
Unlike pencil pleats, they don’t normally need to be gathered using draw cords.
Their hooks are positioned in relation to the sewn pleats.
Step-by-Step Instructions
- Check that the pole or track is suitable for the curtains.
- Identify the hook positions at the back of the heading.
- Insert the appropriate hooks where required, following the curtain maker’s instructions.
- Attach the hooks to the curtain rings or track gliders.
- Ensure that each pleat is supported correctly.
- Adjust the folds so they hang neatly from top to bottom.
Some pinch pleat curtains arrive with hooks already fitted, while others require the hooks to be inserted.
Traditional hand-sewn headings may use pin hooks, while certain manufactured heading systems use specialist pleater hooks.
Don’t substitute one hook type for another without checking compatibility.
Zenn Interiors offers pinch pleat curtains in bespoke styles, including double and triple pleats.
How to Hang Curtains on a Track
Curtain tracks use runners or gliders to support and move the curtain.
They’re often chosen where a discreet fitting is preferred or where the window shape makes a straight decorative pole less practical.
Step 1: Check the Gliders
Confirm that the gliders are the correct type for the track.
Make sure enough gliders are present to support the heading.
Check that they move freely along the track.
Step 2: Prepare the Curtain Heading
For pencil pleat curtains, gather the heading and insert suitable hooks.
For pinch pleat curtains, check the hook positions and spacing.
Different headings have different requirements, so follow the relevant method rather than treating all curtains identically.
Step 3: Attach the Curtains
Working carefully, connect each hook to a corresponding glider.
Support the curtain’s weight while attaching the fittings to avoid pulling or distorting the heading.
Step 4: Test the Movement
Open and close the curtains gently.
If the movement feels uneven, check for missing or damaged gliders, incorrectly positioned hooks or obstructions.
Don’t force curtains along a track that appears jammed.
What About Bay-Window Tracks?
Bay windows may have angled or curved tracks.
The gliders and curtain heading must be compatible with the chosen track system, particularly at bends.
Zenn Interiors offers bay-window curtain tracks for suitable window arrangements.
How to Hang Wave Curtains
Wave curtains create regular, flowing folds using a specialist track or compatible pole system.
They’re different from ordinary pencil pleat curtains because the spacing of the folds depends on coordinated carriers and heading components.
Step-by-Step Guidance
- Confirm that the installed track or pole is designed for the chosen wave system.
- Check that the carriers or runners have been fitted in the correct arrangement.
- Identify how the wave heading attaches to those carriers.
- Connect the curtain using the fittings specified for the system.
- Arrange the fabric into its intended alternating folds.
- Test the movement and confirm that the curtain stacks correctly when open.
Wave curtains should not be hung using an arbitrary arrangement of standard hooks and loose gliders.
The carrier spacing, heading tape and attachment method need to work together.
Installation methods vary, so use the instructions supplied with the actual wave system rather than relying on a generic fitting sequence.
Explore Zenn Interiors’ wave pleat curtains.
How to Hang Curtains with Hooks and Rings
Curtain hooks and rings are commonly used for pencil pleat and pinch pleat headings.
The hook connects the curtain to the attachment eye beneath the ring.
Getting the Position Right
For a neatly aligned heading:
- Use compatible hooks.
- Keep the hook positions consistent.
- Check that the rings can move freely.
- Make sure the heading is adequately supported.
- Check the finished curtain drop once the hooks are fitted.
If hooks are placed in different heading-tape rows, sections of the curtain may hang at different heights.
Similarly, using too few hooks may cause the top of the curtain to sag.
If you’re unsure which fittings are required, read our guide to curtain hook types.
How Many Curtain Hooks Do You Need?
The number of hooks depends on the heading and the finished curtain width.
For ordinary tape-headed curtains, hooks are generally distributed at relatively regular intervals.
However, the appropriate spacing varies by heading tape and curtain weight.
For example, a pencil pleat curtain with a gathered width of 150 cm might use approximately 11–19 hooks at intervals of roughly 8–15 cm, depending on the fitting arrangement.
This is only an illustrative guide.
Pinch pleat curtains usually have hooks positioned to match the sewn pleats, while wave curtains use the carrier arrangement specified by their hanging system.
Always follow the curtain and hardware specifications where available.

How to Make Curtains Hang Neatly
Even correctly installed curtains may need some adjustment to achieve the desired appearance.
Arrange the Folds
With the curtains hanging, use your hands to guide the fabric into even vertical folds.
For pinch pleat and wave curtains, follow the shape established by the heading.
Avoid pulling the fabric into sharp creases where the material isn’t designed to hold them.
Allow the Fabric to Settle
New curtains may appear slightly stiff or uneven immediately after hanging.
The fabric can relax naturally over time.
The extent of this change depends on the material and construction.
Check the Finished Length
Stand back and inspect the hem.
If the curtain is touching the floor unexpectedly or hanging unevenly, check the hook positions and whether the correct measuring reference point was used.
Some adjustments can be made using heading-tape pocket positions, but substantial length errors may require alteration.
Avoid Unsuitable Heat
Always check fabric-care instructions before steaming or ironing.
Don’t apply heat directly to sensitive fabrics, coated linings or decorative finishes without confirming that the treatment is safe.
Common Curtain Hanging Mistakes
1. Choosing the Wrong Pole or Track
Not every heading works with every hanging system.
Eyelet curtains usually need a compatible pole, while wave curtains need specialist wave hardware.
2. Fitting Hardware Without Checking the Load
The brackets and fixings must support the completed curtains, not just the empty pole or track.
This is especially important for heavy lined or interlined fabrics.
3. Cutting Pencil Pleat Cords
Gathering cords should normally be tied and tucked away rather than cut.
Cutting them may make later adjustments difficult.
4. Using Too Few Hooks
Insufficient support may cause sagging or uneven folds.
Hook spacing should follow the heading’s construction and fitting requirements.
5. Measuring from the Wrong Point
The correct starting point for the finished curtain drop depends on the heading and hanging system.
Refer to our curtain measuring guide if you’re uncertain.
6. Ignoring Stacking Space
Curtains need room to gather when opened.
If the pole or track is too short, the open curtains may continue to cover a significant part of the window.
7. Forcing a Jammed Track
If the curtains don’t move freely, inspect the gliders, hooks and track before attempting further movement.
Forcing a jammed system can damage the fittings.
How to Care for Curtains After Hanging
Appropriate care helps maintain the appearance and condition of your curtains.
Remove Dust Regularly
Light dusting or gentle vacuuming with a suitable upholstery attachment can help prevent dust accumulating in the folds.
Follow the fabric manufacturer’s recommendations.
Follow the Care Label
Not all curtains are machine washable.
Some fabrics, interlinings and constructed headings require professional cleaning or specialist treatment.
Don’t assume that regular machine washing is suitable simply because the curtains are made from fabric.
Protect Fabrics from Moisture
If condensation forms on the glass, avoid leaving curtains pressed against damp surfaces for prolonged periods.
Persistent moisture can affect fabric condition and may contribute to mould problems.
Keep Curtains Away from Naked Flames
Candles and other naked flames should be kept well away from curtains and other combustible furnishings.
Avoid Unnecessary Handling
Pulling directly on delicate fabric or decorative headings can distort the curtain.
Use the intended operating method, particularly with motorised or specialist track systems.
Frequently Asked Questions About Hanging Curtains
How high should I hang curtain poles?
Around 10–15 cm above the window opening is a common design starting point, but the ideal position depends on ceiling height, wall construction, hardware and curtain length.
How wide should a curtain pole be?
Where space permits, extending the pole beyond the window can allow curtains to stack beside the glazing. Around 15–20 cm on each side is a starting point, not a universal requirement.
How do you hang pencil pleat curtains?
Gather the heading tape to the required width, secure the cords without cutting them, insert the hooks evenly and attach them to compatible pole rings or track gliders.
Do eyelet curtains need hooks?
No. Eyelet curtains normally hang directly from a suitable pole passing through their reinforced eyelets.
Can you hang pinch pleat curtains on a track?
Yes, provided the track and fittings are compatible with the curtain heading and weight.
Can wave curtains go on a normal curtain pole?
Wave curtains generally need a specialist compatible pole or track system. An ordinary pole without the correct carriers and fittings won’t produce the intended wave arrangement.
Why are my curtains hanging unevenly?
Possible causes include inconsistent hook positions, uneven floor levels, incorrect measurements or problems with the pole or track.
Should you wash new curtains before hanging them?
Not routinely. Follow the manufacturer’s care instructions. Many made-to-measure curtains are best hung without washing, and some require specialist cleaning.
Can I hang heavy curtains myself?
Some installations are suitable for DIY, but heavy curtains need appropriately rated hardware, suitable fixings and safe handling. Professional fitting may be preferable where the load, wall construction or access is uncertain.
Made-to-Measure Curtains and Hanging Systems in London
Correct hanging is essential for achieving a beautiful curtain finish.
From accurately positioned poles to compatible hooks, tracks and specialist wave systems, each component affects how your curtains look and operate.
At Zenn Interiors, we specialise in bespoke made-to-measure curtains for London homes, including pencil pleat, pinch pleat, wave, cartridge pleat and tailored pleat styles.
We also offer a range of curtain poles and tracks designed for different window arrangements.
Explore our luxury made-to-measure curtains and curtain poles and tracks, or contact Zenn Interiors to discuss your window treatment requirements.
Telephone: 020 7871 3082
Email: zenninteriors@gmail.com
This guide provides general fitting advice. Always follow the installation instructions for your specific pole, track, curtain heading and wall construction.